Today I have the lovely Abbie here to share a fun Tutorial from "Try-It Tuesday" over at her blog Five Days... 5 Ways. Every Tuesday Abbie posts something great for you to try... um, that's why she calls it "Try-It Tuesday"... *wink* She has everything from yummy recipes to fun tutorials for you, be sure to check her out!
* * *
Hey there, SoChick! readers. I’m Abbie from Five days…5 ways, and it is such a fun treat to get to visit and share in Melissa’s big shop-anniversary celebration. Congrats, girl!
Today, I’m going to show you how to make a super-easy ruffled ribbon flower clip. These turn out so cute and are incredibly versatile (think bags, belts, shoes, sweaters…anything that would be better with a flower clipped to it…which is pretty much everything, as far I’m concerned).
In fact, I’m giving away a pair of these cuties—along with everything else you see below (including one of Melissa’s fabulous clutches)in my September Giveaway, so if you haven’t already, make sure you enter to win you some prettiness.

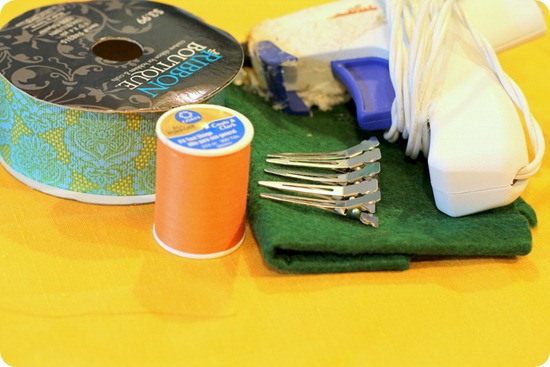
Here’s what you’ll need to get started:

- Ribbon of your choice: I used patterned 1.5” grosgrain ribbon (50% off at Hobby Lobby right now)
- Coordinating thread
- Glue-gun
- 1.5” (or smaller) alligator clips
- Felt (I just used craft felt for this project)
1. Cut a 30” length of your ribbon. Once you’ve gathered your ruffle, this much ribbon should give you about a 2” flower.
2. Fold your ribbon in half, wrong sides together:

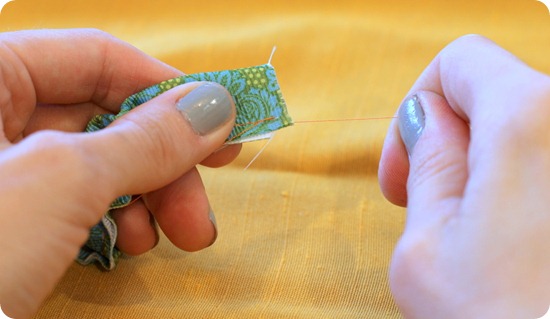
3. Starting with one end, back-stitch just a bit to secure your tip. Set your machine stitch to its longest length (you want your stitch fairly loose) and sew your edges together. Do NOT backstitch at the end of your ribbon. **You could definitely hand-stitch this as well:

4. Make a knot in the backstitched end of your ribbon:

5. Grab one of your free threads at the opposite end and begin to pull and “scrunch”…

…until you have a ruffle that runs the length of your ribbon.

6. Wrap the excess thread around the non-knotted end to keep your ruffle from…well…unruffling.

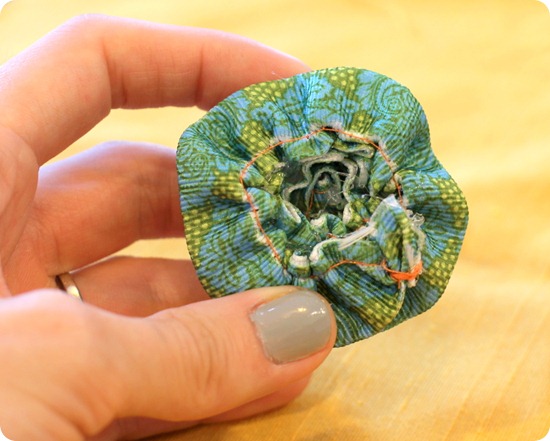
7. Starting with your knot, begin to wrap your ruffle clockwise (with the folded rather than the stitched edge facing up) around it, securing it with dabs of hot glue every 1/2” or so.

8. Once you’ve achieved the shape you want (oh yeah, and run out of ribbon), tuck the tail underneath the flower and secure with another dot of glue:

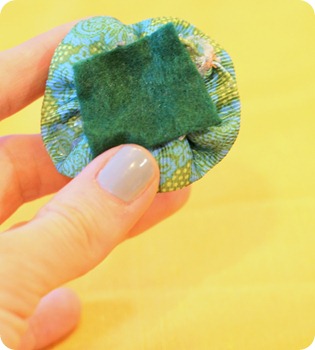
9. Cut a small felt square

10. Glue your felt square to the bottom of your flower:

11. Glue your alligator clip to the felt square, making sure to separate the clips prongs so that you don’t glue them together. (You could also hand-sew the clip to the felt square before attaching it to the flower, but I went with the lazybones version this time).

12. Find something (or in my case someone) cute to clip it on, and stand back to admire your handiwork:

I couldn’t choose a favorite shot, so I just included them all.
You’re welcome.
And there you have it! A high impact, low time-commitment little accessory that will have people asking you, “Where’d you get that adorable flower?” everywhere you go (and yes, I’m speaking from personal experience, but I did have it clipped to my daughter, so I think I cheated).
If you’ve never stopped by for a visit, I’d love to have you by Five days…5 ways to say howdy! I’ve got lots more tutorials, thrifting advice, fitness ideas, a house tour—basically a little bit of everything—waiting for you.
Oh, and don’t forget about The September Giveaway (I’m still trying to figure out a sneaky way to win it myself)!
See you soon!
* * *
Great tutorial; isn't Abbie's little chickie the most adorable model?! Thanks for sharing with us!
Hop on over to enter that GiveAway... and while your at it, check out and enter THIS ONE, too!
If you missed yesterday's Social Media tips from Gina of #SetUpShop, check it out HERE.
Come back tomorrow for another fabulous Guest Post from a beautiful gal who is such an inspiration!

No comments:
Post a Comment
Please leave a comment and let me know your thoughts, this chick LOVES hearing from you!